Overview
Characters are used for Dialogue to give speakers names and on screen portraits as well as stylize that characters text.
Version 1.0 | Last Updated: 2025-01-15
Characters are used for Dialogue to give speakers names and on screen portraits as well as stylize that characters text.
MyModName_CharacterName.
To use this character, you will need to configure a dialogue. Read more about Dialogue here.


| Name | Summary |
|---|---|
| Conditional Character Name |
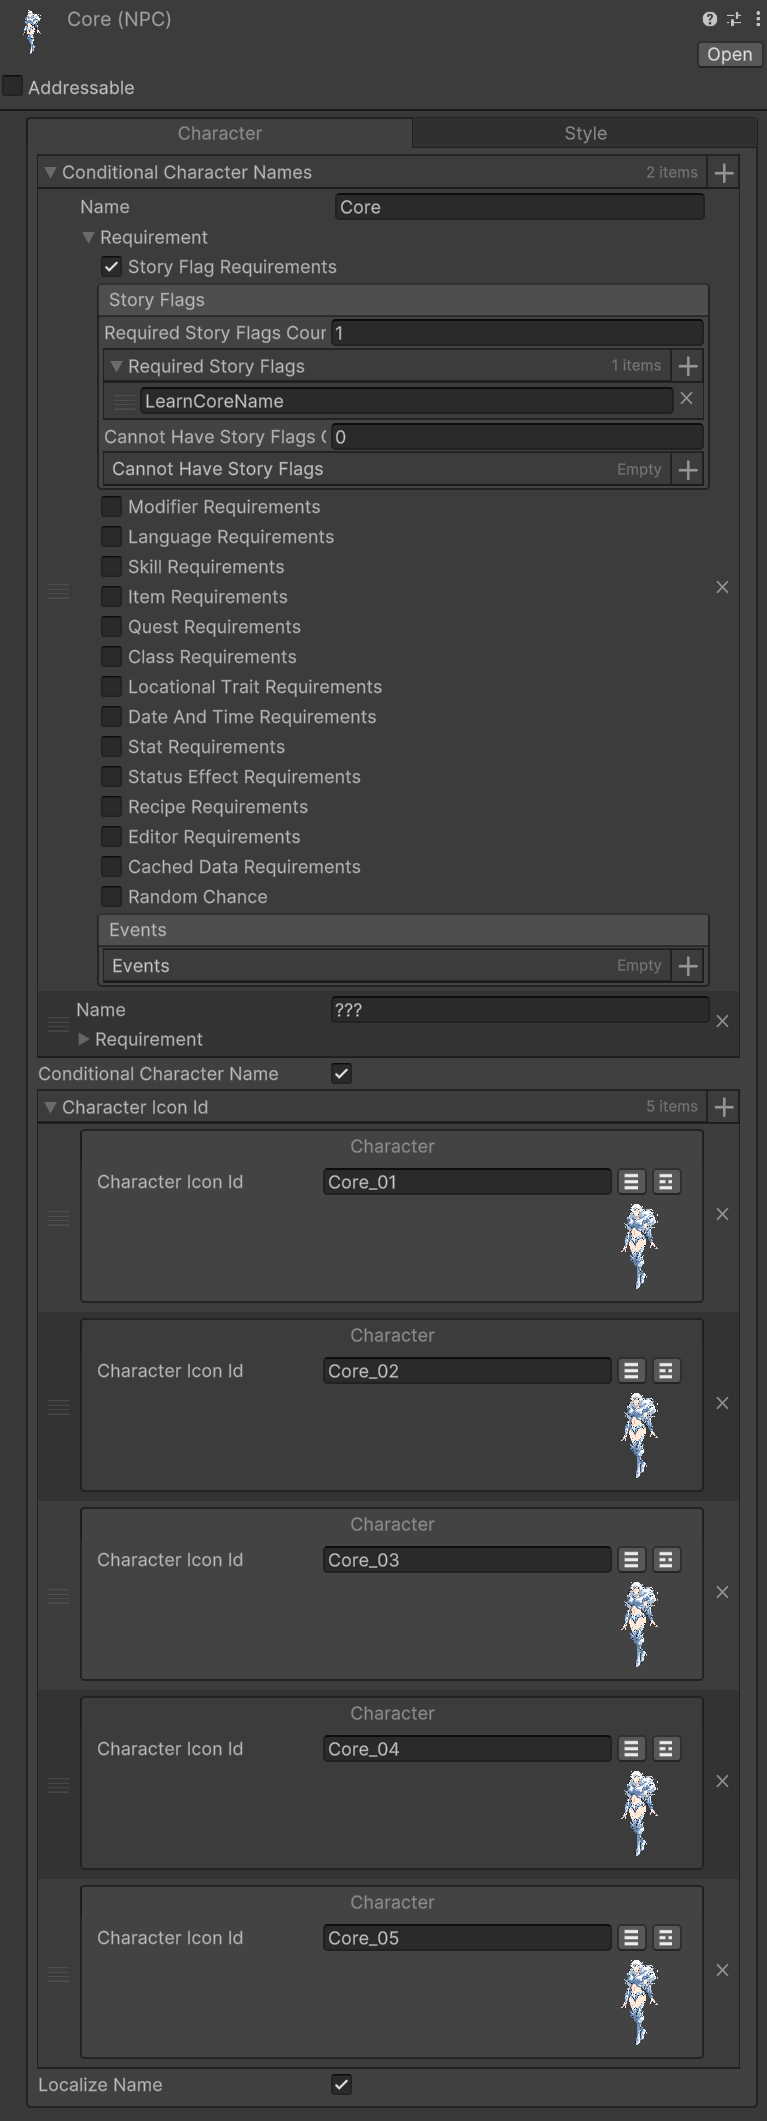
A flag for marking if a character name should be dynamically set based on conditions (Interaction Requirements). If disbaled you can set a static name. When enabled you can add entries for what the characters name is. This lets you setup learning a name, adding nicknames, etc.
Read more about Interaction Requirements here. |
| Character Icon ID |
The addressable paths of portraits that the character uses. Read more about Addressables here. To swap between portraits set the "Character Pose" value on your dialogue under the character tab. The character icon index starts at 0, this means 0 = the top image, adding 1 to that Pose ID as you go down the entry list. Read more about Dialogue here. Note: This is not to be confused with the avatar system which handles complex animated characters and multiple characters on screen at once. Read more about Avatars here. |